
Melhor conversor de vídeo com IA definitivo
![]() 100% seguro. Sem anúncios.
100% seguro. Sem anúncios.
![]() 100% seguro. Sem anúncios.
100% seguro. Sem anúncios.
Conteúdo
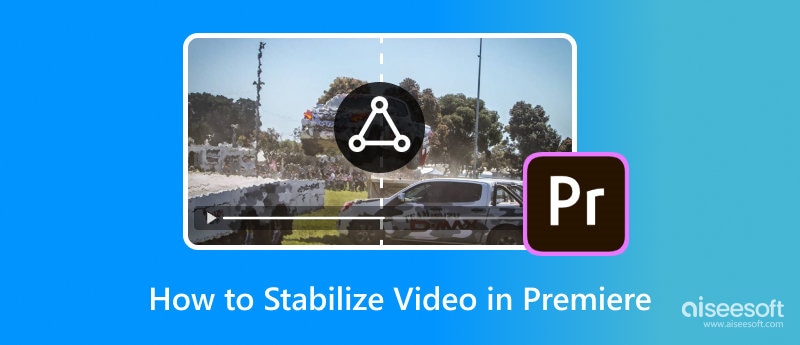
Estabilizar seu vídeo é essencial para criar uma aparência profissional e de alta qualidade. Seja uma filmagem de vlog feita à mão ou um zoom de alta resolução, o Adobe Premiere Pro oferece uma poderosa ferramenta integrada chamada Estabilizador de Distorção para suavizar a imagem.
No entanto, aplicar o efeito simplesmente geralmente resulta em um fundo "instável" (o Efeito Gelatina) ou zoom excessivo. Este artigo explica como fazer isso. como estabilizar vídeos no Premiere Com instruções detalhadas e as melhores configurações.
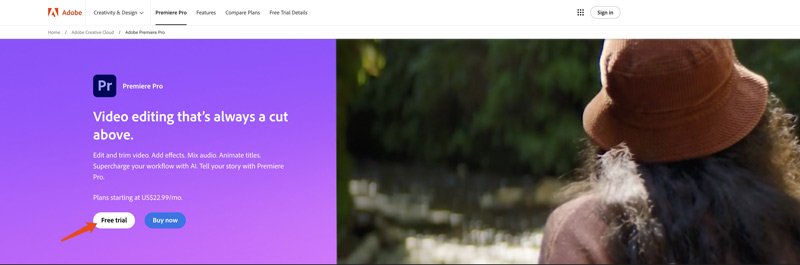
Premiere Pro é um software de edição profissional desenvolvido pela Adobe. É amplamente usado para criar vídeos de alta qualidade para vários propósitos. O Premiere carrega todas as funções de edição necessárias. A Adobe permite que você use o Premiere Pro gratuitamente por 30 dias. Baixe-o e siga os Passos abaixo para estabilizar um vídeo no Premiere.
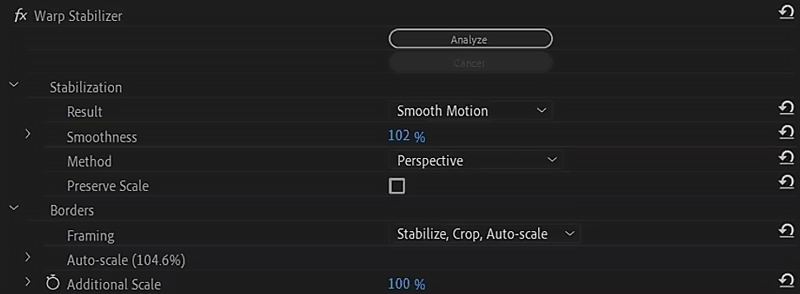
Após a conclusão da análise, as configurações padrão podem fazer com que seu vídeo pareça robótico ou artificial. Acesse o painel Controles de Efeito e ajuste as seguintes configurações:
Suavidade: Alterar isso de 50% para 5% - 10%.
50% tenta eliminar todo o movimento, o que dá uma aparência artificial. 5-10% mantém a sensação natural de segurar o aparelho na mão, mas remove as micro-trepidações.
Método: Alterar de Deformação do Subespaço para Posição, Escala e Rotação.
Conforme mencionado na tabela acima, isso impede que linhas retas (como paredes ou horizontes) se curvem ou ondulam.
Enquadramento: Certifique-se de que esteja configurado para Estabilizar, Cortar e Dimensionar automaticamente.
Se você vir barras pretas dançando nas bordas, essa configuração as corrige aplicando um pequeno zoom.
Avançado (Opcional): Se a filmagem ainda parecer estranha, marque a caixa para Análise Detalhada. Isso leva mais tempo, mas analisa mais pontos do vídeo.
Embora o Warp Stabilizer seja poderoso, ele apresenta duas falhas principais com as quais os editores profissionais têm dificuldades:
O "Efeito Gelatina" (Distorção):
Como o Premiere tenta distorcer a imagem para mantê-la estável, os fundos muitas vezes parecem estar submersos. Isso prejudica o aspecto profissional de fotos de arquitetura ou paisagem.
Perda de resolução (corte):
Para disfarçar as bordas tremidas, o Premiere aplica um zoom. Se a sua filmagem estiver muito tremida, ele pode cortar de 20 a 30% da imagem, transformando seu vídeo 4K em uma imagem borrada em 1080p.
Hardware pesado:
A análise de vídeos em alta resolução exige um uso intenso da CPU. A execução de análises em segundo plano pode deixar o computador lento se houver vários vídeos em execução.
Se você deseja estabilizar imagens sem cortes excessivos ou ajustes complexos, precisa de uma ferramenta baseada em inteligência artificial.
Se você só quer estabilizar rapidamente seu vídeo e melhorar a qualidade, especialmente quando não tem o programa Premiere instalado em seu computador, você pode tentar usar alguns intensificadores de vídeo especialmente projetados primeiro. Comparados ao Premiere, essas ferramentas geralmente oferecem uma maneira mais eficaz e direta de fazer estabilização de vídeo.
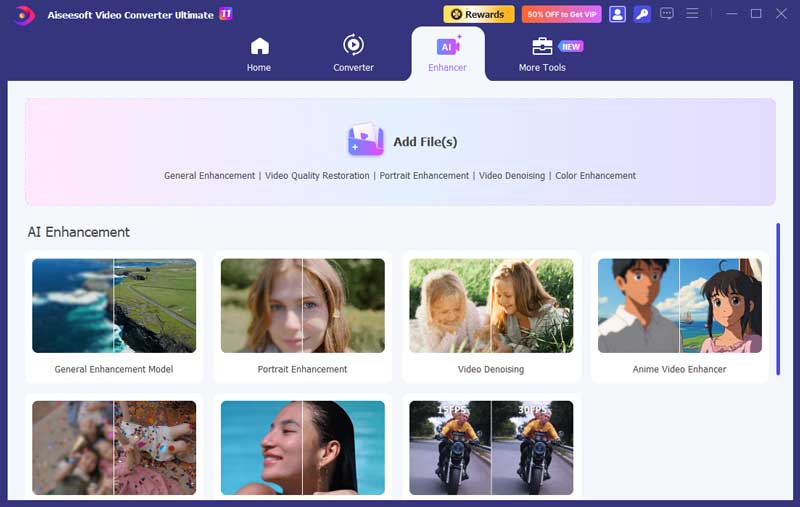
Esta parte recomenda o poderoso software de upscaling e aprimoramento, Aiseesoft Video Converter Ultimate, para você estabilizar vídeos, reduzir a trepidação da câmera, remover ruído de fundo, aumentar a clareza e otimizar a experiência visual geral. Ele usa IA avançada para analisar de forma inteligente o momento original da câmera e problemas de trepidação e, em seguida, estabilizar seu vídeo.
![]() 100% seguro. Sem anúncios.
100% seguro. Sem anúncios.
![]() 100% seguro. Sem anúncios.
100% seguro. Sem anúncios.
Você pode capturar vídeos tremidos com frequência, mesmo que a tecnologia anti-tremido da câmera tenha se tornado mais desenvolvida. Para tornar seu vídeo menos tremido, você pode tentar filmar com um tripé. Usar um tripé pode efetivamente minimizar o tremor da câmera desde o início.
Se seu telefone ou câmera estiver equipado com uma função de estabilização, você deve habilitá-la para estabilizar seu vídeo. Você também pode tentar usar diferentes técnicas de estabilização para obter a forma de estabilização desejada. Além disso, você pode ajustar várias configurações para tornar seu vídeo capturado menos trêmulo.
Para esses vídeos instáveis gravados ou baixados, você pode contar com o Premiere Pro, VidHex ou outros associados vídeo mais suave ferramentas para estabilizá-los.
Como estabilizo um vídeo no Premiere Pro sem cortá-lo?
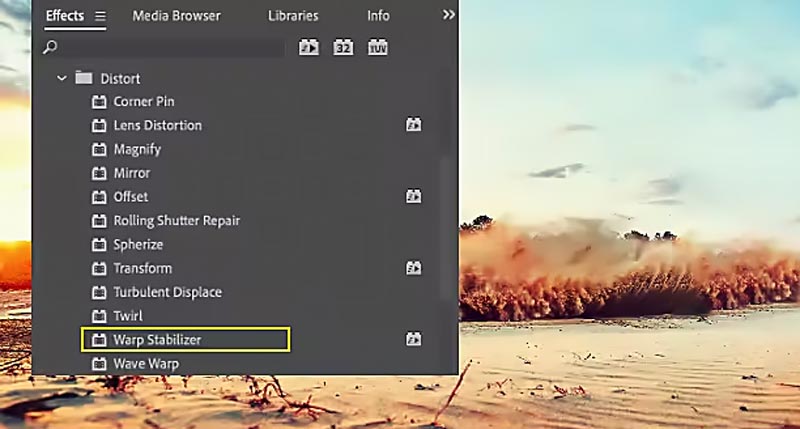
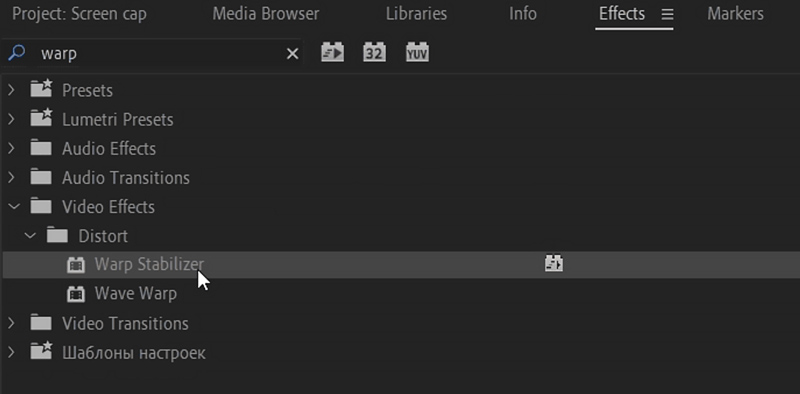
Conforme mencionado acima, você pode contar com o efeito Warp Stabilizer para estabilizar um vídeo no Adobe Premiere Pro sem cortes. Adicione o vídeo trêmulo e coloque-o na linha do tempo para edição. Vá para a seção Effects, escolha Video Effects e, em seguida, localize e clique na opção Distort. Em Distort, você pode aplicar o efeito Warp Stabilizer para tornar seu vídeo mais estável e suave. Em seguida, o Premiere Pro analisará o vídeo para estabilização.
Por que o Estabilizador de Distorção está desativado ou não funciona?
Isso geralmente acontece se a velocidade do clipe tiver sido alterada (câmera lenta/avanço rápido). Para corrigir, clique com o botão direito do mouse no clipe, selecione "Aninhar" e aplique o efeito à sequência aninhada.
O Warp Stabilizer consegue corrigir o desfoque de movimento?
Não. Ele apenas estabiliza a posição do quadro. Se a câmera tremeu tanto que a própria imagem ficou desfocada, o Premiere não consegue corrigir. Você precisa de um aprimorador de vídeo com IA (como o VidHex) para desfocar os pixels.
O estabilizador de deformação reduz a qualidade?
Sim, ligeiramente. Como a imagem é ampliada para cortar as bordas tremidas, há uma perda de nitidez. Para vídeos em 4K, isso é insignificante, mas para vídeos em 1080p, a perda de nitidez pode ser perceptível.
Conclusão
Se você já tem essa ferramenta em seu computador, você pode seguir o guia acima para usá-la facilmente estabilizar seu vídeo no Premiere. Como mencionado acima, a Adobe oferece um teste gratuito de 30 dias para usar o Premiere. Você também pode baixá-lo e tentar usar o efeito Warp Stabilizer.
 Guia completo sobre como aprimorar vídeos no Premiere Pro
É possível melhorar a qualidade de vídeo no Adobe Premiere Pro? Ele possui um recurso de aprimoramento de vídeo com IA? Aprenda como melhorar a qualidade de seus vídeos usando o Premiere Pro aqui.
 Animação suave: como fazer suas animações parecerem fluidas
Descubra como criar animações suaves com Passos simples, truques do After Effects e o VidHex, que aprimoram o movimento para resultados perfeitos e realistas.
 5 Melhores Programas Gratuitos para Aprimoramento de Vídeo (Online e para PC) [Análise de 2026]
Compare os melhores aprimoradores de vídeo gratuitos, como CapCut, Media.io e Picwand. Corrija vídeos desfocados, aumente a resolução para 4K e remova ruídos. Veja os prós, os contras e as melhores alternativas de IA para desktop.

O Video Converter Ultimate é um excelente conversor, editor e aprimorador de vídeo para converter, aprimorar e editar vídeos e músicas em 1000 formatos e muito mais.
![]() 100% seguro. Sem anúncios.
100% seguro. Sem anúncios.
![]() 100% seguro. Sem anúncios.
100% seguro. Sem anúncios.
*Campo obrigatório
*Por favor, insira um e-mail válido
