Procreate, a powerful image creator and processor, can help people deal with their image-related needs in many ways. However, the app's richness of functions inevitably leads to difficulties in learning: When people have a need, they don’t know what to do. This article will show you how to remove background Procreate through three different approaches and introduce a much simpler tool to fit that specific need. Here we go!
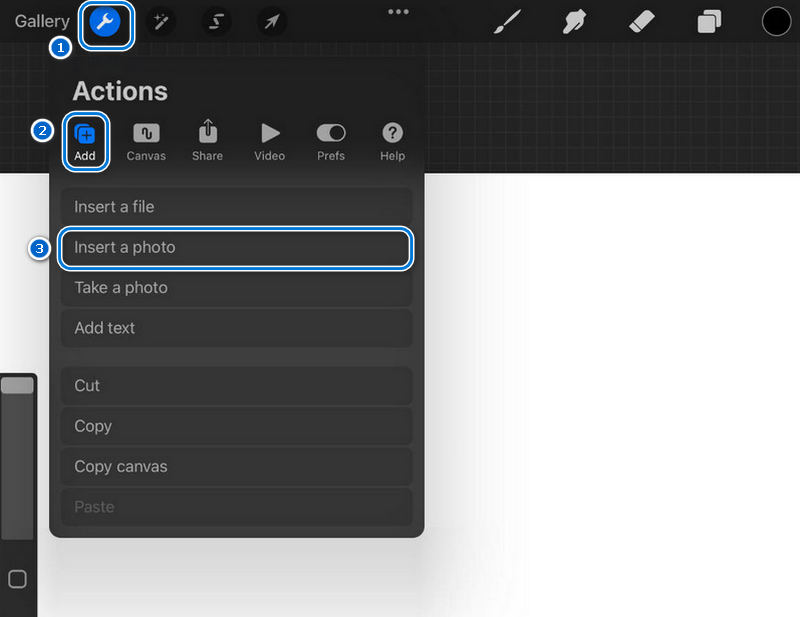
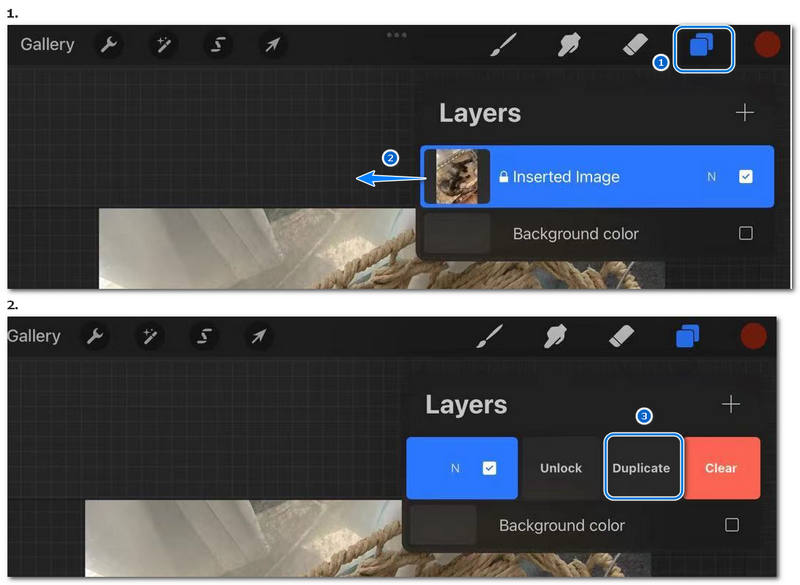
Before exploring the specific steps for removing a picture background, one should first import the picture into Procreate and prepare it.

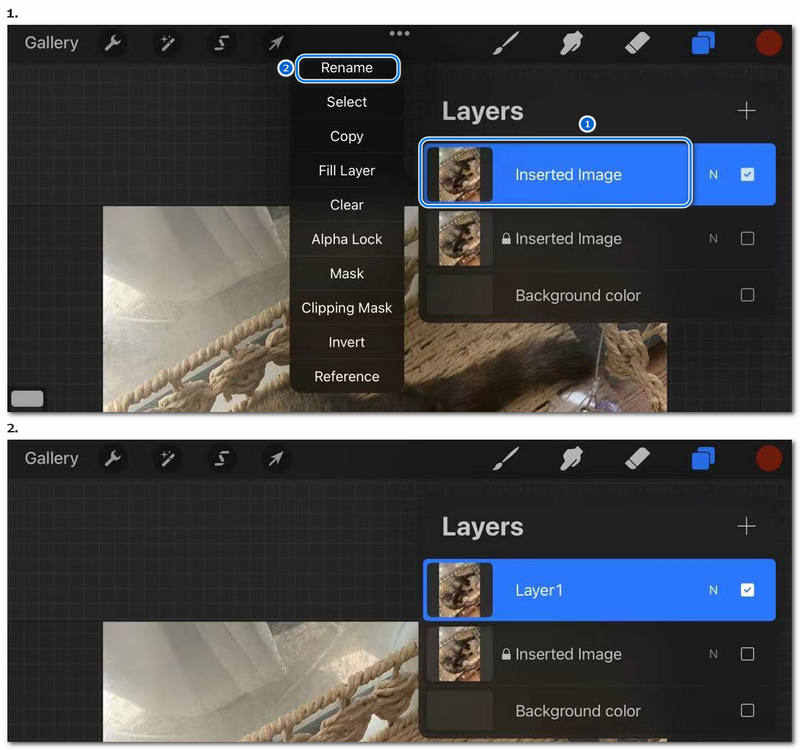
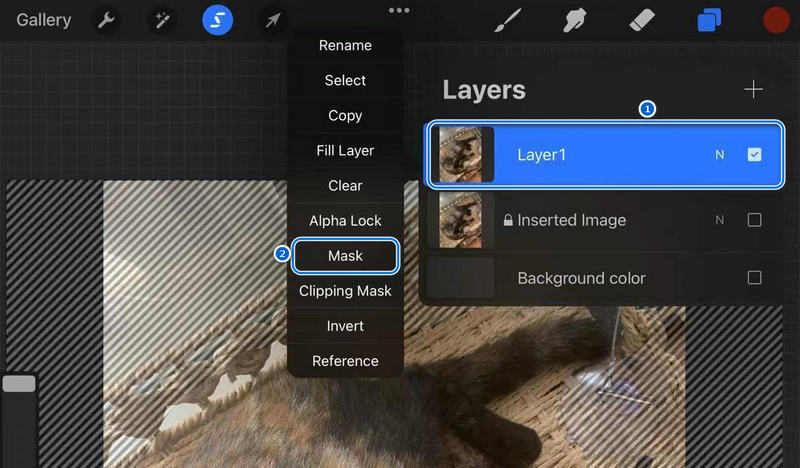
You can give a long-press instead of a quick tap on the layer to reveal a different operation list. Here we choose Rebatizar and rename the copied layer as “Layer 1” for the sake of convenience. Remember, you can only operate on the unlocked layer, so tap on Camada 1 to select it before closing the Camadas menu.
If you accidentally do something wrong in Procreate, you can undo your operations by double-finger tapping. Now that the preparation is finished. Let’s remove the background!
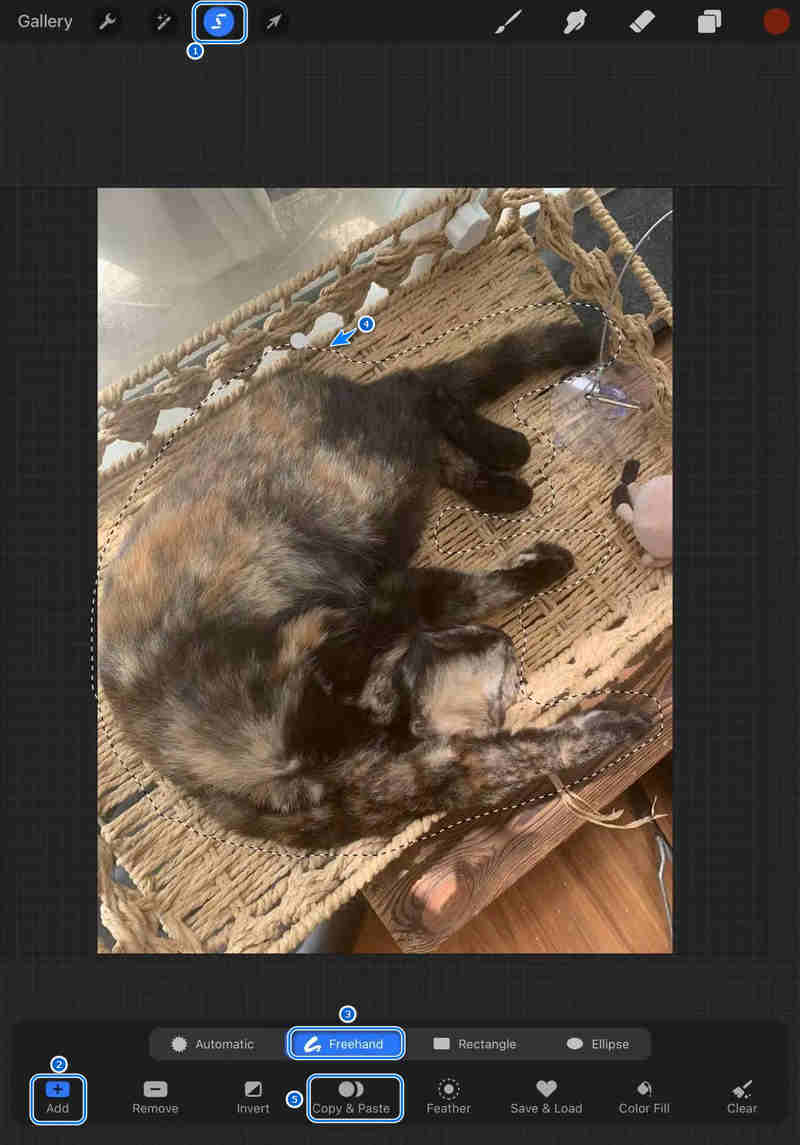
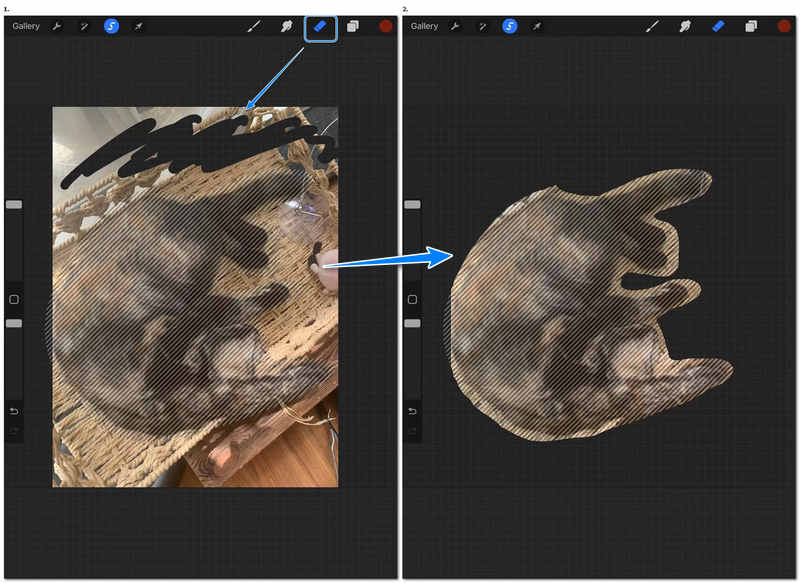
Com o Seleção tool to remove the background of pictures with simple shapes and distinguished colors is efficient.
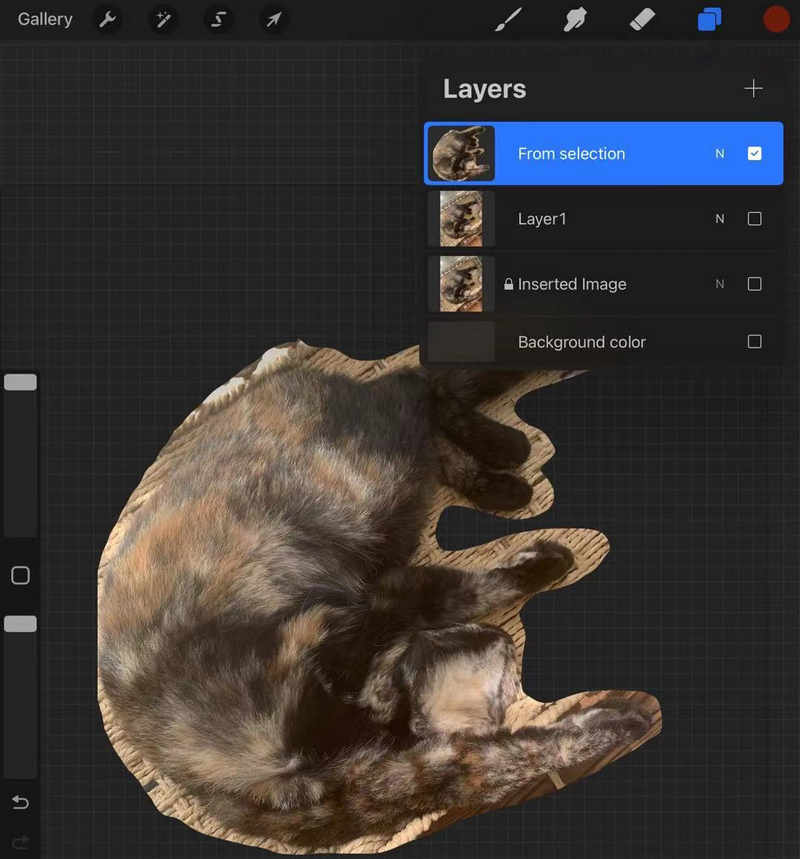
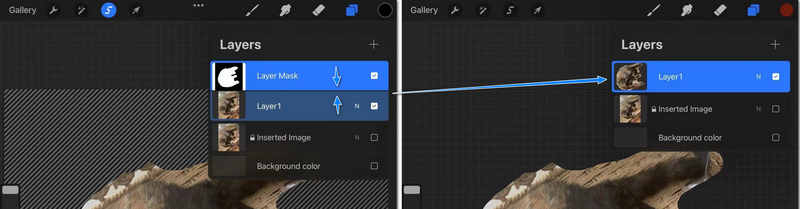
Em seguida, toque o Camadas button and untick the visibility box of Layer 1 and the background color.
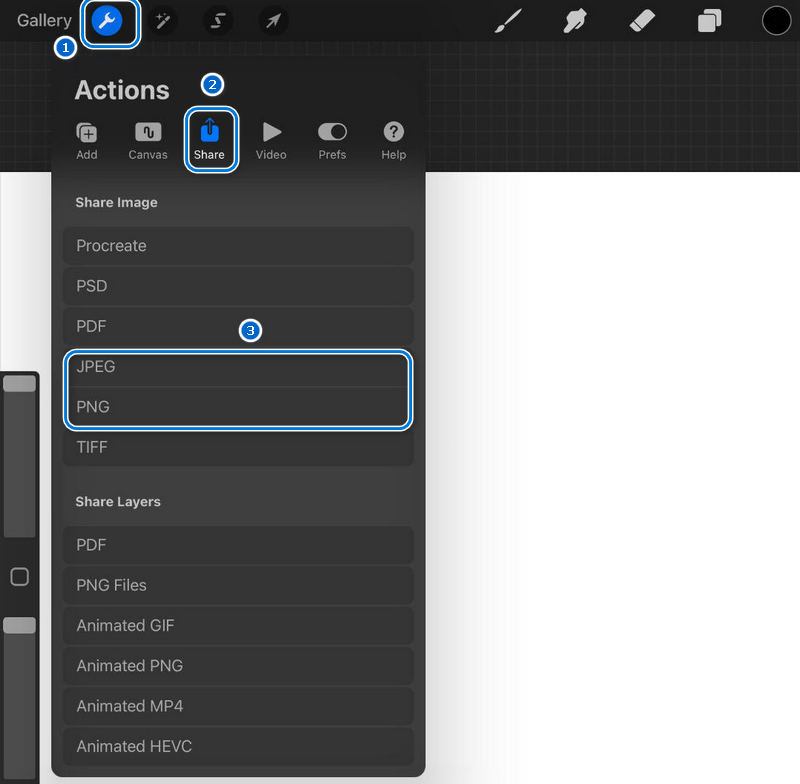
Now that you know how to make the background transparent in Procreate, it’s time to learn how to export it for your use!
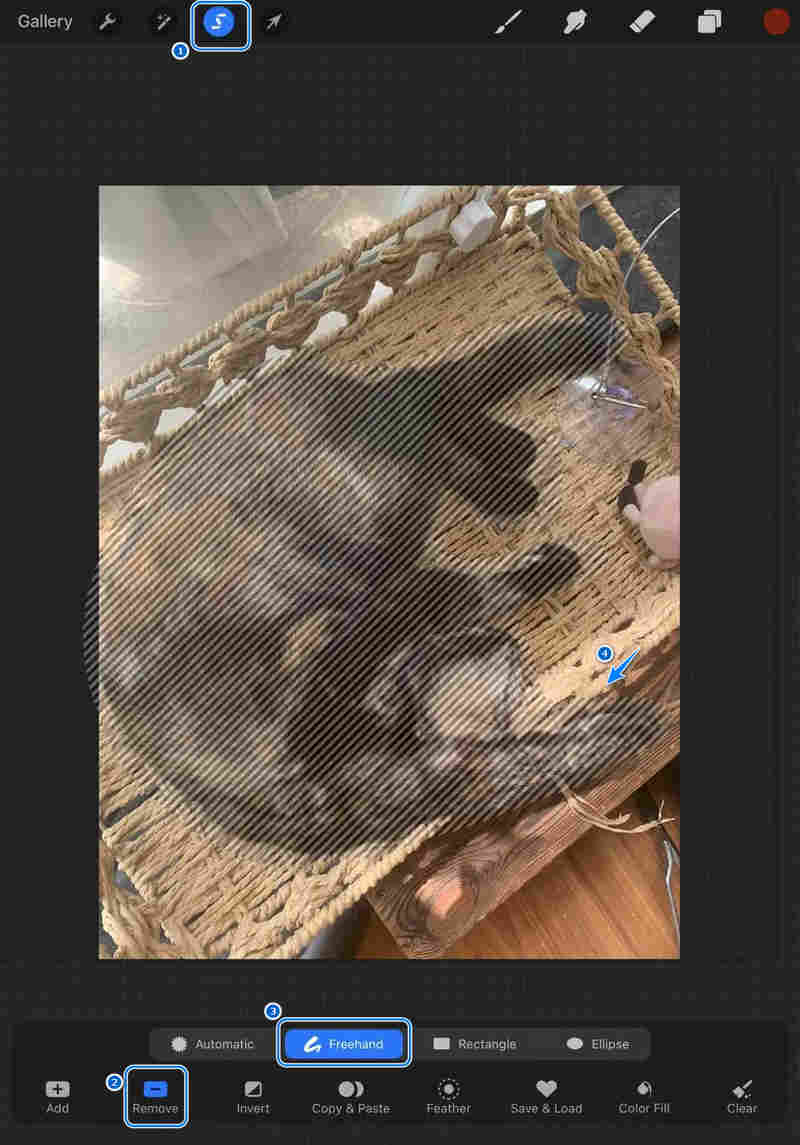
Com o apagador tool in Procreate to remove unwanted pixels may be the first method people think of when they consider how to remove BG in Procreate. It’s certainly possible and could do the job reasonably quickly when combined with the selection tool.
O Plano de Ação Global para Saúde Mental XNUMX-XNUMX da Camadas e Máscara techniques in Procreate are rich and efficient but not very friendly to new users. Let’s see one relatively simple way to use Camadas e Máscara to remove white background from a picture.
Removing the background in Procreate is technically possible. Still, after trying the approaches mentioned above, you may find that it is not that easy for amateurs of painting to produce a satisfactory result: the automatic selection mode often misreads the boundaries of objects in similar colors, and the freehand selection mode needs you to be highly patient when drawing the outlines. Moreover, if you want to deal with multiple pictures, the repetitive preparation work of the pictures will undoubtedly be laboring. It’s safe to say that Procreate is not the best option for eliminating unwanted backgrounds, considering all its time and skill thresholds.
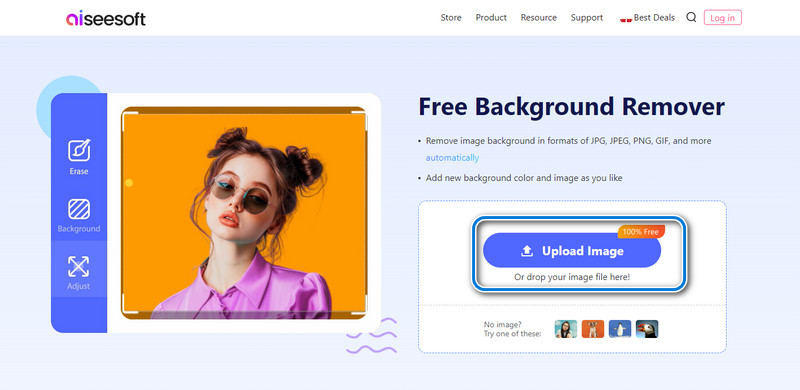
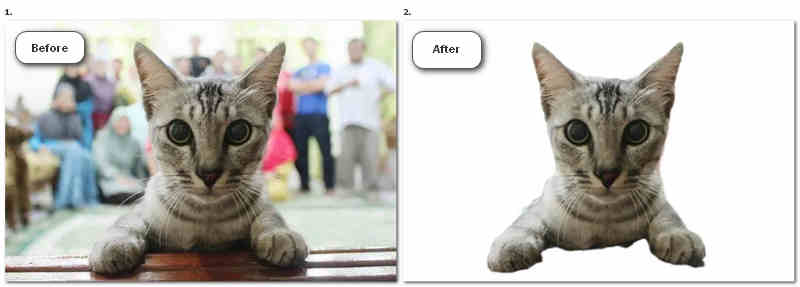
A recommended choice for those struggling with background problems in pictures is Aiseesoft background remover. Compared to Procreate, Aiseesoft background remover is simple to use and master. With simple clicks and adjustments, the background remover can produce a highly satisfactory result within seconds, which will undoubtedly be handy when you must deal with many pictures. Aiseesoft bg remover also has other outstanding features as follows:
• Automatically removes background with an advanced AI algorithm
• Supports processing pictures in JPG/JPEG/PNG/GIF
• Provides background changing, size editing, and precise erasing of pictures
• Quick processing speed without any installation
• Free for processing an unlimited amount of pictures
Click the link to remove your unwanted BG for two steps!
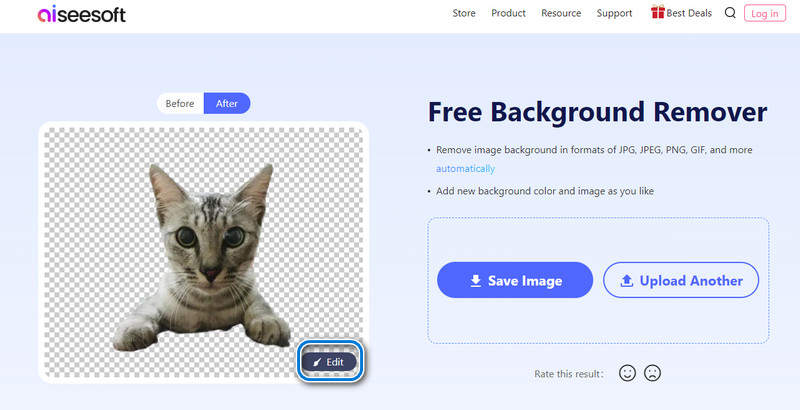
If you are unsatisfied with the processed picture or have additional editing needs, try the edit function.
What tools in Procreate are best for background removal?
Using layers and masks is the best method if the picture is complicated, but for cutting out simple objects from the picture, the selection tool is more recommended.
Can I restore the original background after removing it in Procreate?
If you are asking this during the editing process, you can try double-fingered taps on your iPad to undo your operations. But if you’ve already saved your work once as pictures without duplicating the original images or layer information, then the only hope would be restoring the picture from your backup.
How can I replace the background color in Procreate?
After clearing the background of your picture, add a layer below it, and then paint the blank layer with a brush of the color you like. If you still have the Background color layer, changing the color of it will also do. Then, pinch those two layers to merge them into one.
Conclusão
This article provides three different approaches to the question of how to remove background in Procreate and an alternative for Procreate when background removal is needed: Aiseesoft background remover. Procreate, though being a versatile image-creating tool, may not be a convenient background remover for common people. Aiseesoft background remover, on the contrary, specializes in only background removal and intends to meet the needs of the vast majority. Have a try on from the link above and start your easy background removal life from today!
 Como adicionar, desfocar, alterar, remover e usar o fundo CapCut
Como posso colocar um plano de fundo no CapCut? Como você faz um papel de parede de fundo CapCut? Esta postagem explica como adicionar, desfocar, alterar e remover fundos CapCut.
 Aprenda a remover fundo transparente no Illustrator
Como criar um fundo transparente no Illustrator? Como posso remover o fundo branco no Illustrator? Aprenda a remover fundo no Adobe Illustrator.
 Tutorial concreto para remover fundo de imagens no iPhone
Se você está procurando uma maneira de remover o fundo de suas imagens no iPhone, você tem sorte, pois este guia apresenta três métodos acionáveis em detalhes.

Amplie e aprimore imagens em até 4K em lotes rapidamente com amplo suporte para vários formatos de imagem.
![]() 100% seguro. Sem anúncios.
100% seguro. Sem anúncios.
![]() 100% seguro. Sem anúncios.
100% seguro. Sem anúncios.
